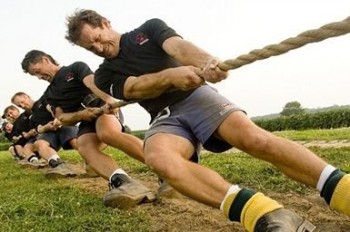
Erect a 6 man sleeping tent and a “toilet tent” (this includes ground tarp and rain tarp.)

Erect a 6 man sleeping tent and a “toilet tent” (this includes ground tarp and rain tarp.)
 While some of us have operated in the field under emergency conditions such as during hurricanes and just after earthquakes, most hams haven’t.
I have done both, but during the recent series of Haitian earthquakes I have been, for the most part, on the “sidelines”.
I currently monitor some of the emcomm traffic coming out of the affected area by listening to the SATERN frequencies and even taking a turn at being a SATERN net control op.
Very few communications have been coming out of the country because there are presently only two amateur radio operators down there.
Hopefully, things will change if agencies get “their act together” and send communications “Jump Teams” to help send health and welfare traffic from Haiti so loved ones back in the U.S. and other countries will know that their friends/relatives in Haiti are alive. Just this simple act will relieve a lot of burden and suffering.
 Some ham radio activity from Haiti is beginning to be heard, following yesterday’s devastating earthquake.
Father John Henault, HH6JH, in Port-au-Prince, made contact late Wednesday morning with the Intercontinental Assistance and Traffic Net (IATN) on 14.300 MHz, the IARU Global Centre of Activity frequency for emergency communications. Based on relays monitored at W2VU, Father John reported that he and those with him were safe, but had no power and no phone service. He was operating on battery power and hoping to get a generator running later in the day. He asked the station copying him, William Sturridge, KI4MMZ, in Flagler Beach, Florida, to telephone relatives with information that he was OK.
The following frequencies are in use for earthquake-related traffic and should be kept clear unless you are able to provide requested assistance:
Additional frequencies may be activated on different bands at different times of day, so be sure to listen carefully before transmitting to make sure you are not interfering with emergency traffic.
W2IK now has a new EMCOMM only web site: WWW.W2IK.NET which contains emcomm info including parts of his 250 page “EMCOMM AND YOU” CD.
This site is a work in progress and is constantly growing, but it’s presently loaded with lots of useful information about developing your own emergency communications skills.
This site contains ONLY EMCOMM material.
The new Canadian training course contains over 100 pages which were written by W2IK, so we must be doing something right.
In the spirit of, as Lee, N5NTG, put it: “….it struck me how much the “turf boundaries” between clubs has shrunk, …… I think that “shrinking” is a good thing to be happening”
In the spirit of cooperation, the Bexar Operators Group has offered to underwrite and offer their “2010 Jump Team Boot Camp” to members of the Chaparral Amateur Radio Club (which happens to also be the Guadalupe County ARES group).
This would be the third “Jump Team Boot Camp” given by the Bexar Operators Group. It would be a two-day (not three day) deployment event at a site with no facilities north-east of Austin. This “Jump Team Boot Camp” will concentrate on amateur radio and the ways and means to get a communications jump team operational should there be a need to deploy some distance from your home and communicate in the aftermath of a disaster. This session is planned for the weekend of March 20-21st, but we are open to other weekend dates within this Spring time frame.
Read the rest of this entry »
Today marks 8 years ago that the United States was attacked by terrorists. 8 years ago, today, amateur radio stepped up to the task of supporting the relief efforts during this most trying time. Below is the story of what one ham, who now resides in San Antonio, did to help his country.
http://www.w5bog.com/world-trade-center.html
W2IK
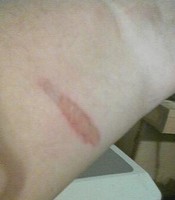 I was updating some of my wiring harness for my ham radio emergency go-kit, and needed to unsolder some wires from a LED switch to that I could try to reuse it. I succeeded in getting the older wires removed and cleaned the solder off the terminals so that I could later reattach the connectors of my choice.
But something happened (this was 3am in the morning) and the soldering pencil (all 12 watts of it) decided to roll off the table and land on the inside of my left forearm.
Ouch! Those things are hot enough to melt solder, and hot enough to start burning their way thru my skin, especially the more tender skin on the inside of my arm rather than the weather beaten outer side. 🙂
Kids, don’t try this without adult supervision, and adults, don’t try it without adult supervision.
I should have used my soldering station to put the pencil in while hot, but that was outside in my van from when we were installing the antenna and power lines for the radio, and (did I mention it was 3am?) so I didn’t feel like going out side to fetch it back inside just for a quicky task.
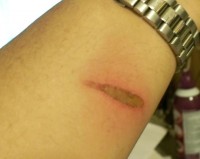 Shame on me for taking short cuts and using my spare soldering pencil without taking proper precautions to ensure it didn’t get knocked off and start a fire or other hazard (like hitting my arm).
Six days later (8/5), and burn mark still very noticeable. Not hurting as much, still keeping neosporin applied, plus those spray on bandages instead of tape on bandages. Here’s a current photo.
I may have mentioned to some of you that I had switched 100% over to using Anderson Power Pole connectors a few years back. But unless you wanted to shell out some big $$ to buy those power blocks from West Mountain Radio to the tune of $55-$100+ each, you had to build your own power block splitters.
 Local Ham Operator, Grumpy, WF5Y, has a home-brew flat panel with 8 Anderson Power Pole connectors, each with their own fuse, similar to the WMR version, and he was asking $50 each at the Austin Summerfest.
But after visiting with the DC Power folks from Beaverton, Oregon, www.dcpwr.com, during the Plano Hamcom last June, I went to Wes Allen K7WWG’s web site to see what he had available. I found an affordable solution in the form of a Red-Dee-2 8 port connector block (Model PS-8) that would allow me to feed power to 7 other devices. The price? $28 plus shipping.
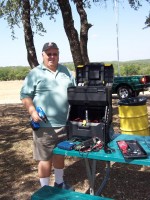 Our regular readers will remember a posting we made earlier (June 12, 2009) about an Emergency Go-Kit Idea that involved some minor surgery to a Stanley Toolbox with wheels, by adding a couple of sealed lead acid batteries in the bottom compartment, a 12 volt 30 amp Pyramid power supply, a 300 watt DC to AC power converter, a home-brew battery charging circuit, etc.
I’ve made some more progress on this project, adding an external on/off switch to control the exhaust / cooling fan on the side of the toolbox, and adding an external AC power plug on the other side to make it more convenient to plug in up to two AC devices to the emergency go-kit toolbox. Of course, I suppose you could use a power strip to plug in more, but the circuit is limited to 15 amps and the converter will only handle 300 watts. I’ve labeled the exterior plug warning of the limitations, and also have a surge reset button mounted nearby.
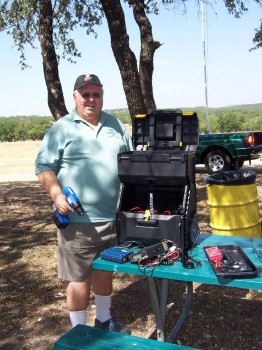 Here’s a photo taken of me on Sunday, July 12th, about 3 hours before my van held an impromptu BBQ Cook-off in the middle of the road.
Little did I know what was about to happen, but I sure looked satisfied at the time of this photo, at least with the progress I was making with my emergency go-kit in a rolling tool box.
By the way, the story posted earlier about W21IK and his antenna test at Bullis County Park? This photo was taken by W2IK during that event, because he said it wasn’t fair that I got to take all the photos and hide behind the camera. 🙂
I started out with a plain heavy duty Stanley brand toolbox w/ wheels available from Wal-mart for about $20.
This toolbox was selected because the wheels were mounted on a single piece steel rod shaft that ran the full width, from wheel to wheel. In other words, the wheels weren’t simply snapped onto the sides like some of the other cheaper models I had looked at elsewhere. Also, I had looked at some two-piece toolboxes that stacked, but they ran the risk of having the two pieces come apart at the wrong time while loading or unloading from your vehicle, or rolling to where ever you needed the kit to be. I just liked the idea of a one-piece double stacked toolbox with strong wheels that were unlikely to come off at the wrong time.