 A small section from our 200 page “JUMP TEAM BOOT CAMP” training manual
by Bob Hejl – W2IK
Your Em-Comm deployment group is only as good as the antennas they use. With this in mind, you must use antennas that are “tried and true” yet simple to erect in an emergency. They DO NOT have to be expensive. They should not be an elaborate concoction of wires or elements (NO BEAMS… You are NOT working DX as 99% of all HF emergency communications will be on the lower HF bands and probably not more than 300 miles).
There was only one case in over 20 years where I had to do emergency communications using 10 meters and this was communicating from New York to Hawaii (which had a hurricane) and relay the traffic back to California because due to propagation neither Hawaii or California could hear each other.
Your antennas DO have to work – every time and under a myriad of conditions such as freezing weather, monsoon-type rains, sustained winds or sizzling heat. They must also be stored and ONLY used for deployment purposes. They should not be something you scrounge together before heading out for a deployment. Back up antennas are vital. You need to have redundancy (two of each antenna so if there is a problem, such as a branch falls down on one that makes it un-repairable, or a failure such as a center connector breaking or burning out, it will not prevent you from getting on the air)
There is NO SUCH THING AS A “MIRACLE ANTENNA” no matter what you’ve read in ads or what a few hams “swear” by.
Emergency deployment is no game. If you need a question answered about a particular antenna, feel free to email me: alonestaryank@aol.com
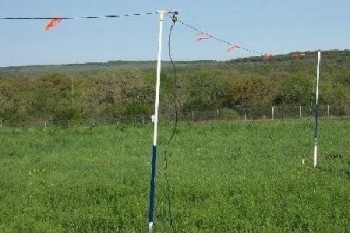
Your cache of antennas should include at least two NVIS antennas that are “free standing” (they come with their own supports. See the photo below), two vertical VHF/UHF antennas that exhibit gain and have telescoping masts that allow them to deploy to at least 15 feet high for search and rescue.
 Also have on hand at least two 40 meter dipoles which can be used as an “inverted V” with masts and support guys/stakes, etc. so it can be deployed with an apex at least 30 feet high. An 80 meter dipole is also suggested.
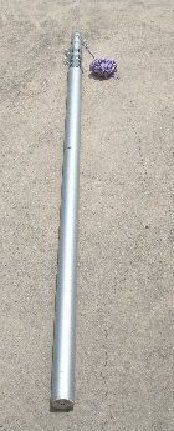
 I use an “inverted V” antenna with just one center mast so it can be raised or lowered.
This uses one part of NVIS theory in that a lower antenna is not as susceptible to receiving “static crashes” from any nearby storms.
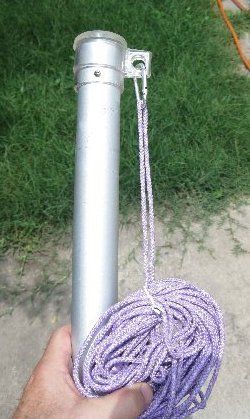
The pictures here show an “inverted V” that uses a center pulley system to allow you to raise or lower the antenna to whatever height you need. NVIS and “inverted V” antenna systems will be erected during our “Jump Team Boot Camp” and participants will see the differences and how noise level changes with antenna height.
VERTICAL HF Antennas should be avoided as they tend to receive more man-made noise like leaky/shorting power line insulators, etc.
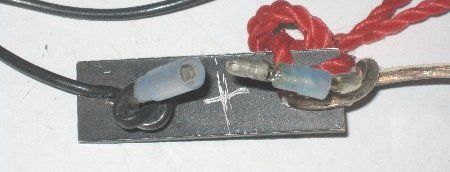
40 Meter operation (unplugged)
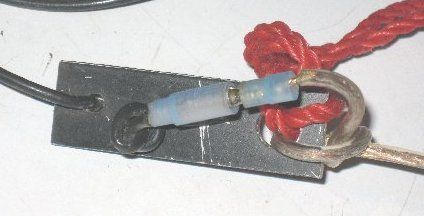
80 Meter Operation (plugged in to extend antenna length)
The antenna I prefer to use, (a basic 40 meter dipole as an “inverted V”) also has at it’s ends simple connectors so you can quickly install “80 meter band adders” without having to completely disassemble the antenna. (See photos above of “unplugged” and “plugged” examples of “adders”)
If it is used in an “inverted V” design all you have to do is erect the antenna with the 80 meter wires running along the line of the antenna and when you wish to change bands simply plug in, or unplug, the 80 meter wire sections.
I’ve used this configuration since I deployed after hurricane Hugo in the Virgin Islands in 1989 and during ice storms in upstate New York in 1998. This antenna takes under a minute to change bands and on either band will still give you a full length antenna for each band making it very efficient.
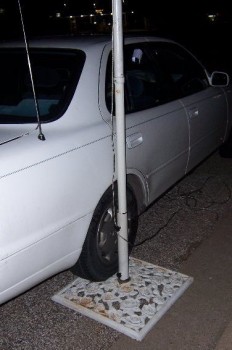 Your “Antenna Man” should be experienced at erecting antennas where there are no support structures such as trees or buildings. You can usually find some sort of vertical piece to “bungee cord” a mast to, or you could use a “drive on support base” which uses one of your vehicle tires to make a sturdy base assembly which has a short pipe to slide your vertical mast in. (see picture on right with mount under car wheel).
I have used one of these bases many times including during 2 hurricanes to erect my NVIS antenna and had no problems keeping them up.
The ends of the antenna can slope down to lengths of insulated cord and then down to stakes. Make sure that the ends of the “inverted V” are at least 5 feet above ground level and that each of the ends has caution tape on them.
NVIS ANTENNA
There are army-surplus mast sections for sale on eBay which are only 4 feet each and store in a duffle bag that I’d recommend.
You can often find these sets of mast sections at local Swapfests as well, especially the larger ones like the Austin Summerfest or Plano HamCom.
Eight (8) sections will make the 30 ft center support for your inverted “V” although in most cases you won’t have to go that high.
During hurricane IKE, I used only 2 sections and my communications all throughout Texas were excellent.
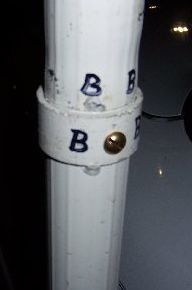 I also drilled holes in each section so you can run a brass bolt/wing nut combo which will keep the sections secured to each other. (see photo) Practice erecting this, and NVIS, antennas until you have them down cold.
Remember to use proper guying techniques. Never run the ends of the antenna close to the ground. Use insulators and nylon cords at each end before you secure the ends with stakes.
Keep the antennas away from high traffic areas. Again, mark your guy lines, all along your NVIS antenna and ends of the “inverted V” with orange flag, or caution, tape so people won’t walk into them or touch them.
You’ll also need to bring at least three, 100 ft. runs of RG8X coax with properly installed connectors for your HF gear. Four, 3 ft coax jumpers to go from rig to tuners, three, 25 ft runs of RG8X for your VHF radio operation. (keeping runs of coax under 50 ft for VHF as it will lessen power loss)
Do not use RG58. Spend a few pennies more, buy RG8X. Inspect your coax on a regular basis. Also include at least 4 “UHF” barrel connectors so you can use two cables if you need to make a longer run such as connecting two 25 ft cables together.
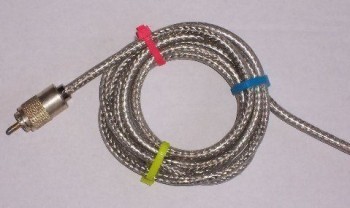 As with the antennas, all your coax cables should ONLY be used for emergency deployment. Always use a “choke balun” (also called an “air balun” or an “ugly balun”) at your antenna feed point so RF doesn’t flow back on the shield. (See a simple choke balun made with at least 8 turns of coax held together as a coil in the picture below.)
Have two (2) 300-watt tuners just for jump team use as you might be using antenna systems that are not cut for the band you will be using (or for NVIS antennas which need tuners to operate, no matter what anyone tells you as ground conductivity and reflection changes from location to location and soil saturation due to rain water will also change your SWR.).
Learn the proper way to use tuners and, if possible, obtain two like model units. De-rate any tuners (use 300 watt tuners) even though your intent is to use just 100 watts on HF. Make sure you ground your rig and tuner.
Yes, to do everything right, you will be spending a few dollars to built / buy the better quality antennas and equipment for your emergency deployment team, but if you are the only team able to get the message thru on a consistent basis, time after time, with practice, wouldn’t it be worth the difference in the end?

August 7th, 2013 at 5:28 AM
Good Article Lee and Bob!